The best and the most optimal tool to swap eyes is done by Adobe Photoshop. However, how to swap eyes in Photoshop? Not everyone is equipped with enough professional knowledge and skills. That’s why this article’s here to save the day and help you eye swap via various amazing and super-easy AI tools.
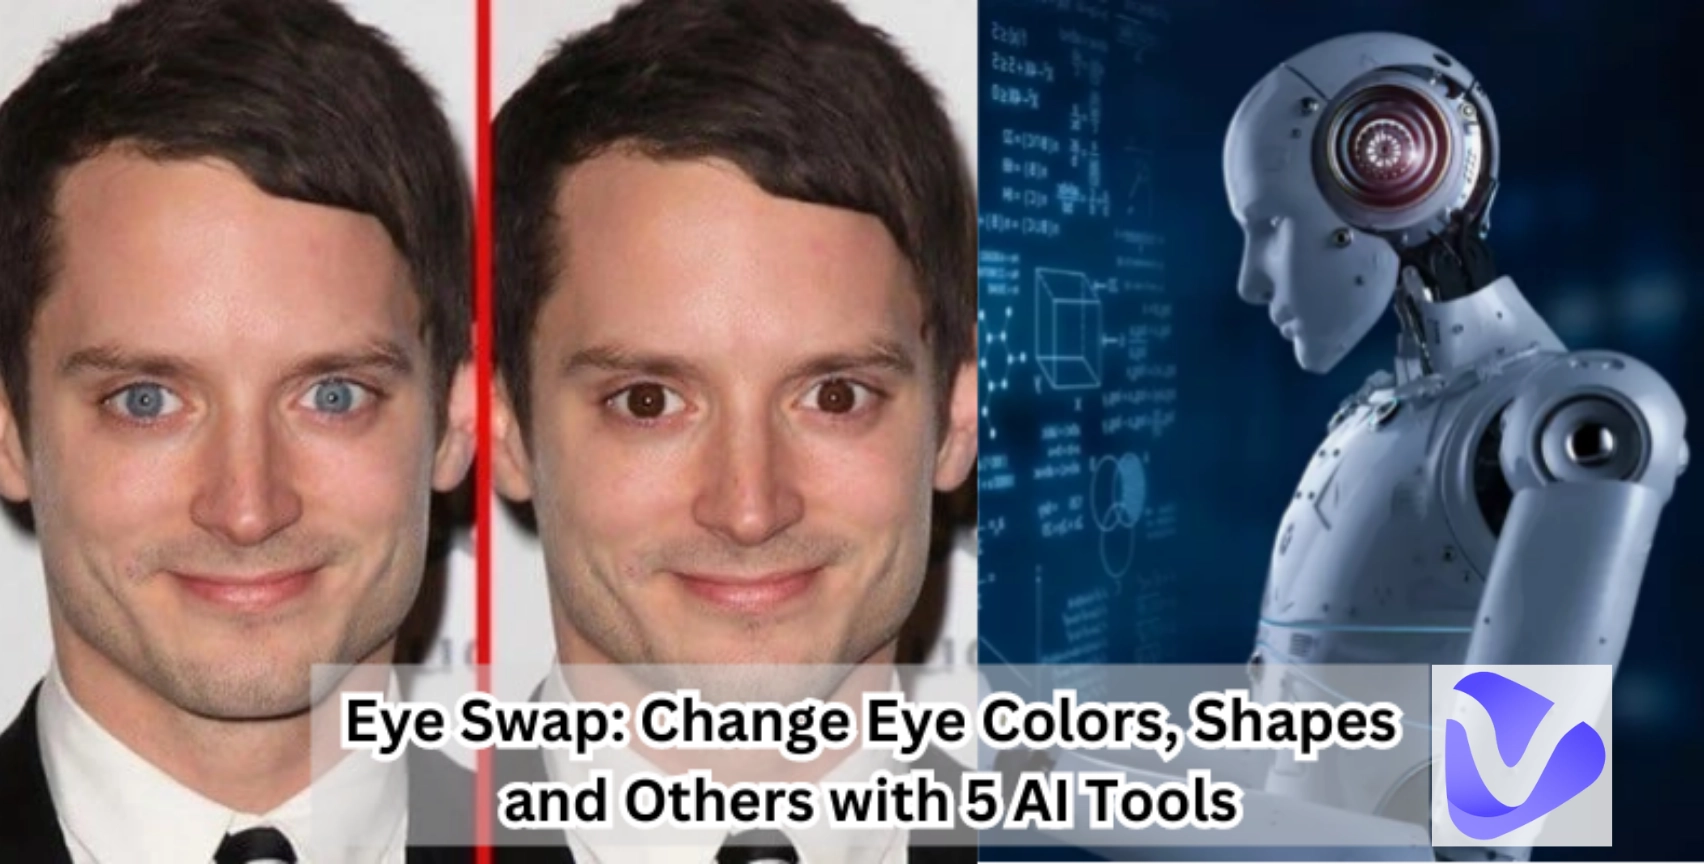
In this article, we’ll show you a step-by-step guide to change eyes with Photoshop. But with eye swap AI, you can also do the complete changing of eye colors, shapes, sizes and even the direction of eyeballs!
- On This Page
-
How to Swap Eyes in Photoshop?
Solution 1. Swap the Whole Eye Parts
Solution 2. Swap Eye Colors
-
Manually Eye Swap VS AI Eye Swap
-
4 Eye Swap AI Tools to Get You Beautiful Eyes in Photos
1. Natural Eye Color Swaps with Fotor AI Eye Changer
2. Retouch to Swap Eye Sizes on Mobile with PhotoDirector
3. Swap Eye Directions to Look at Cameras by Veed Eye Contact AI
4. Swap Your Lazy Eyes to Opening Sights on Overflow AI
-
Bonus: Test If the Swapped Eyes Suit Your Face
How to Swap Eyes in Photoshop?
Photoshop is a powerful tool to make various changes in images. So you're totally free to do exquisite eye swap.
This part will tell you to change eyes in 2 ways: whole eye parts changing and iris colors swapping. Let’s begin:
Solution 1. Swap the Whole Eye Parts
Step 1. Download and Install Adobe Photoshop
First of all, you need to install Adobe Photoshop. Please visit Adobe official site and subscribe to the latest PS version.
Step 2. Import Your Images into PS Canvas
Quickly import your media files into the Photoshop interface over a blanket canvas.

- Both of the images should be imported together on the canvas, one should be the source image and the 2nd should be the one whose eyes you want to swap with.
- It is most preferable that the images should be on the same angle and have the same lighting for professional editing, This might sound vague but, seriously it helps a lot.
Step 3. Hide the Original Layer
It’s better to work on a clean layer, instead of the one where too many things are going on. So, you better hide the original layer just by selecting the ‘eye icon’ and starting your editing process on the clean layer.

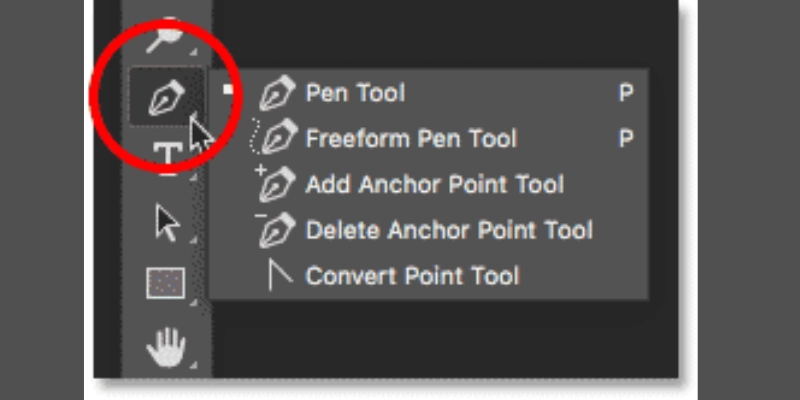
Step 4. Select the Eye Parts You Want to Swap from Another Image
You need to be very careful while selecting the eye region with the pen tool. So, in the 2nd image (the one with which you want to swap eyes), use the pen tool and properly select the eye area.
Step 5. Copy and Paste
Now copy the selected eye by simply using the keyboard keys (ctrl+c) or by right-clicking on the interface to click on the copy option. Paste it correctly in the original image (the one with your face).
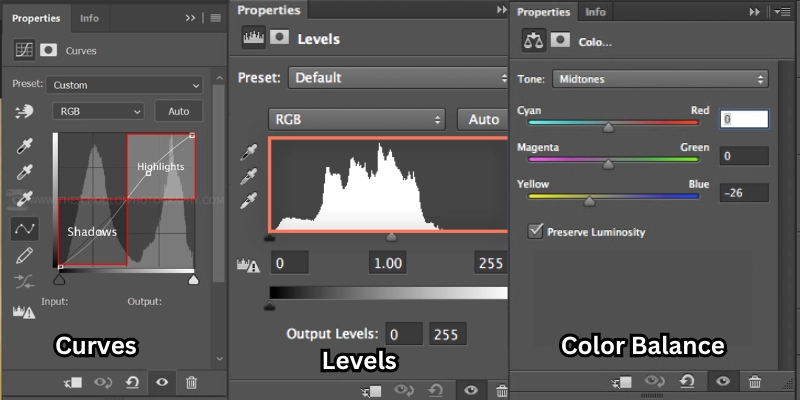
Step 6. Adjust Lighting and Color
Now, if the original image’s lightning, color balance, and everything doesn’t blend well with the eyes, utilize Photoshop’s curves, levels, and color balance to edit the image to the point where skin tone and all the lightning conditions are met.
Solution 2. Swap Eye Colors
Step 1. Create a New Layer
A new layer is needed to perform all the editing and eye-coloring-related tasks. For that, you must click directly on the ‘New Layer’ option or press the Ctrl + J keyboard keys to duplicate the original layer. Don’t worry, the original layer won’t be affected.
Mind if I give you a tip? You must keep a reference image whose eye color you want to copy alongside for better perfection and good iris color results. You can experience a realistic result only by doing that.
Step 2. Select the Eyes Part
The second step demands attention to detail. Take the pen tool and select the iris region. Be aware of the symmetry.
If you think the editing won’t be precise in the original way, consider changing the symmetry to a horizontal flip or vertical flip. It will create a balance and give a realistic effect.
Step 3. Inverse the Selection
If you’re having trouble selecting the iris region properly, consider inversing the selection by pressing Ctrl + Shift + I key. This will result in selecting all the areas other than the iris region to improve your focus and limiting the area for precise editing.
Step 4. Create a Mask
It's so hard to keep focus on a limited region when you’ve too much going in the surroundings. So, even if the surrounding area is selected, you better hide it by adding a layer mask button, which you’ll find at the very bottom of the Layers Panel.
Step 5. Transform the Eyes
This step will test your patience level because it is all about editing, editing, and editing.
- You need to handle all the editing options such as moving, rotating, and scaling the eyes until the eyes match your face so that no one can point out the difference between your original image and your edited image.
- For this precision and smoothness, select the layer where the complete focus is on the eyes and move to the Edit > Free Transform option to access the handles.
Step 6. Refine the Edges
Another tip to properly blend the eyes with your original face is via a soft-edged brush. Ensure its opacity is low so you won’t get into any additional trouble.
Step 7. Add More Details
Take that stress off your shoulders and use the Healing brush to remove any imperfection that you find in the image.
Manually Eye Swap VS AI Eye Swap
| Dimension |
Manual Eye Swap (Photoshop) |
Eye Swap AI |
| Automation |
You can expect struggles e.g. selection, adjustment, and blending, all of these things will be done manually. |
Al will almost do everything, and you just follow the simple guide. |
| Learning Curve |
Complex & Hard. Pro-level graphic edit skills are required. |
Very Simple. Heaven for all the non-tech individuals. |
| Eye-Swapped Result |
Top Quality Results, but you have to invest much time, energy, and skills to get precise results. |
You can expect to see results within seconds, but you might have to compromise on the quality. |
4 Eye Swap AI Tools to Get You Beautiful Eyes in Photos
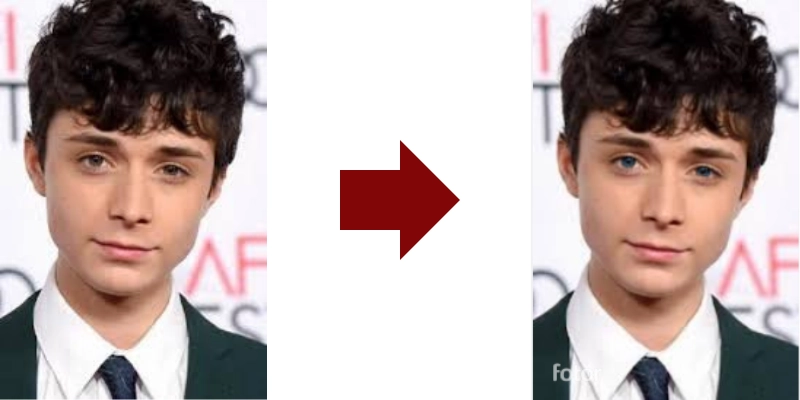
1. Natural Eye Color Swaps with Fotor AI Eye Changer
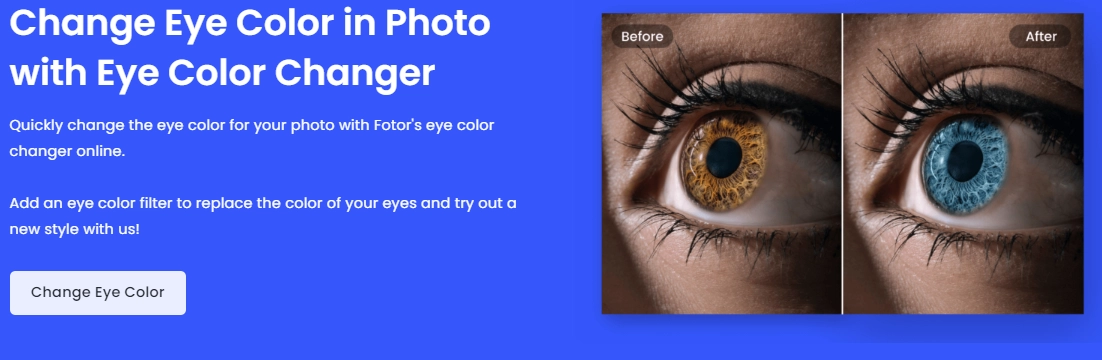
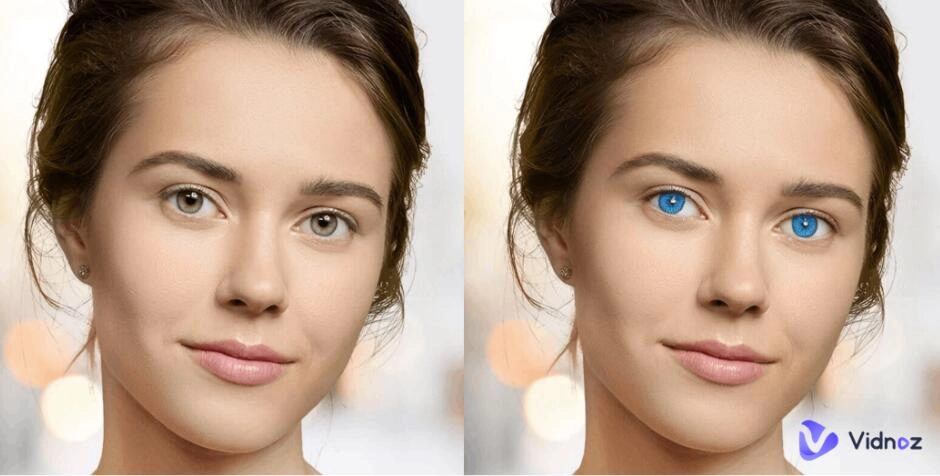
You want to change the color of your irises, but don’t know how to do it in Photoshop? Fotor launches an web-based eye color changing app that can swap colors of the iris in an easy way. In just a few clicks, you can experience impressive and natural eye color transformations. And tech knowledge is not necessary, all you have to do is to follow the guide and make sets as you wish.
Pricing:
- Free for Basic
- $3.33/mo for Pro
- $7.49/mo for Pro+
Key Feature
- Quality and seamless iris color changing.
- Easy to make instand eye color swap.
- Various customize options.
Steps to Swapping Eye Colors
Step 1. Go to the official Fotor AI Eye Changer site and click on ‘Change Eye Color’
Step 2. Upload the picture
Step 3. After uploading your image, you’ll be able to see the editing section. Not just eye color, you will be allowed to do other adjustments too.
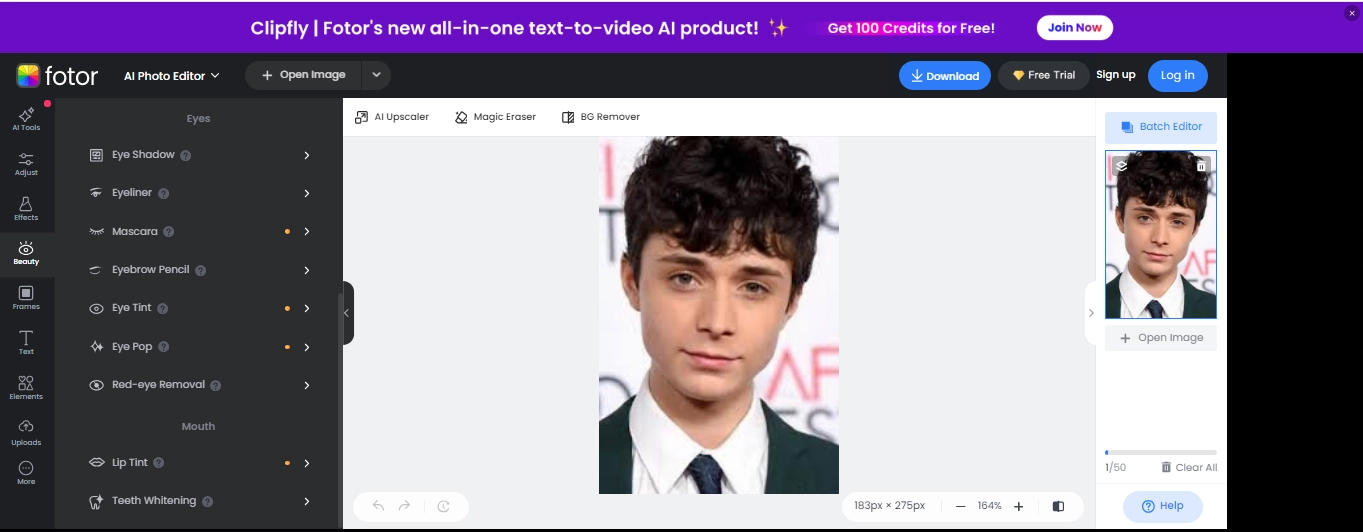
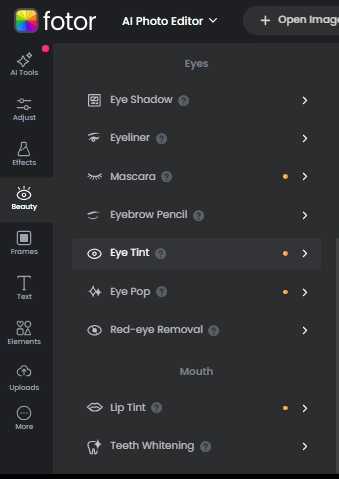
Step 4. Click on the beauty feature and then the eye tint.
Step 5. Choose the color of your choice and then brush it on the eyes in the image, and you’re all set.
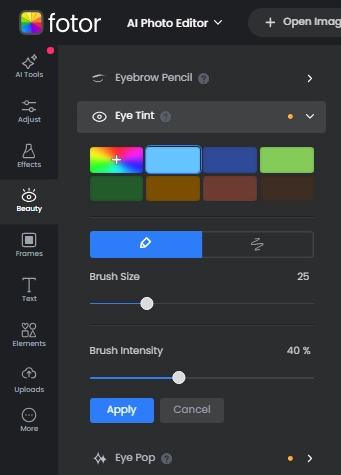
Step 6. As you can clearly see the difference in eye color in the image below. You can adjust the intensity of the iris color as per choice.
2. Retouch to Swap Eye Sizes on Mobile with PhotoDirector
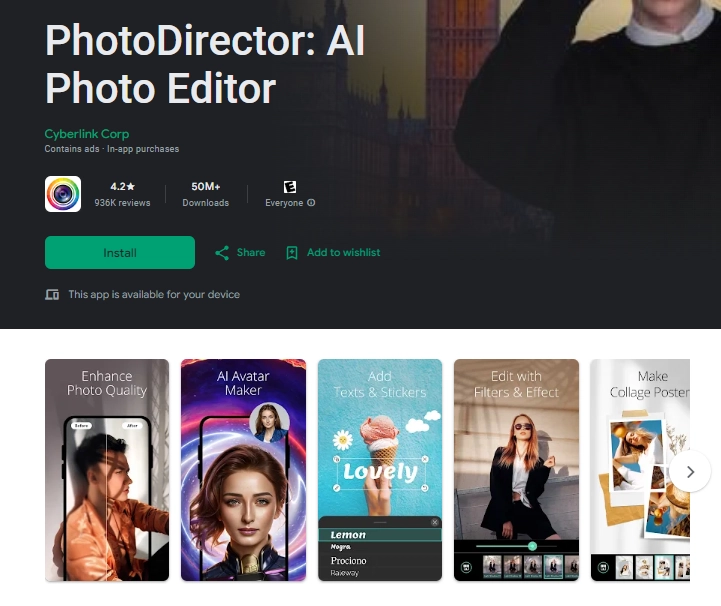
A lot of mobile users procrastinate while using some tools because they have to search it on Google first on their mobile. But PhotoDirector, as an AI photo retouching application, solves this issue by providing you with a solid HID landscape on mobile phones too.
All you can do is download the app and whenever you want a quick, high quality swapped image, open the app and start seeing creative things in milliseconds completely free.
Pricing:
Key Feature
- Instant eye swap results.
- Friendly to mobile users.
- Make adjustments and preview it in real-time.
Steps to Swapping Eye Sizes
Step 1. First of all, you need to download the PhotoDirector app from the Google Play Store app.
Step 2. Choose the edit option to swap eye sizes. You’ll have to select the image which you want to edit.
Step 3. Once you have selected and uploaded the desired image, click on the ‘Face Tool’ that you can get in the toolbar.
Step 4. You’ll find the ‘Eye Size’ option in it. You’ll be given the manual option to resize and adjust the size as per your requirement.
Step 5. After you’re satisfied enough with the editing results, save it or share it directly with your friends and ask for feedback or compliments.
3. Swap Eye Directions to Look at Cameras by Veed Eye Contact AI
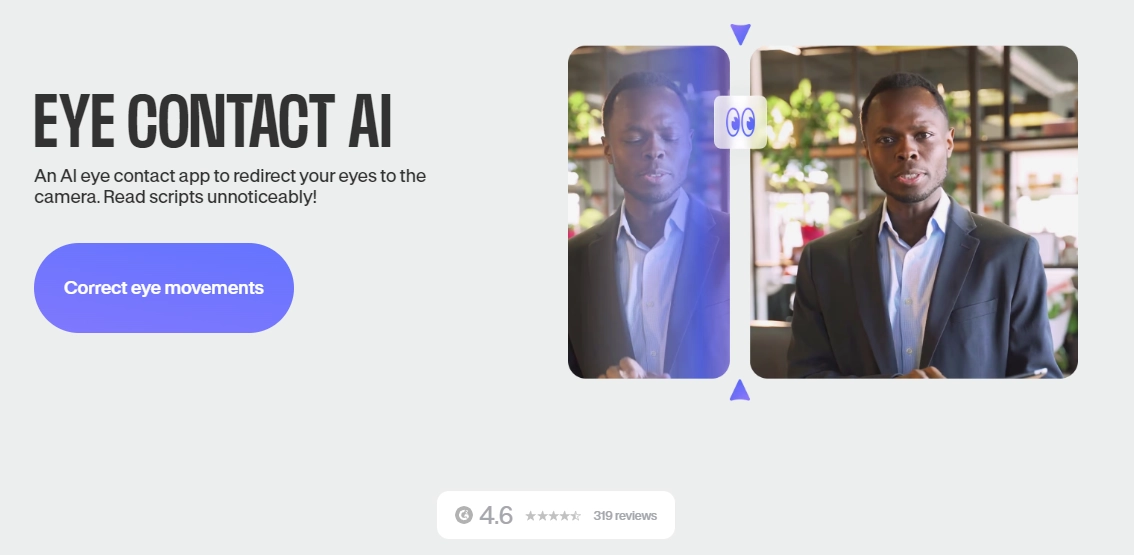
Eye contact is everything when it comes to clear communication. Sometimes, during online meeting sessions and presentations, you lack eye contact which leaves a negative impression.
Instead of recording the video again from scratch, you can use this eye contact AI tool to adjust your eyeball movement throughout the whole video. The editing will be as smooth as butter so that no one will be able to detect if the video is edited or naturally created.
Pricing:
Key Feature
- Swap eye directions automatically.
- Edit eye movements realistically and precisely.
Steps to Swapping Eye Directions
Step 1. Go to the official site and try the free version.
Step 2. It will ask you to sign up, do it. Then you’ll be able to see an interface that looks like this.

Step 3. Click on Upload a file, and select the video that you want to edit.
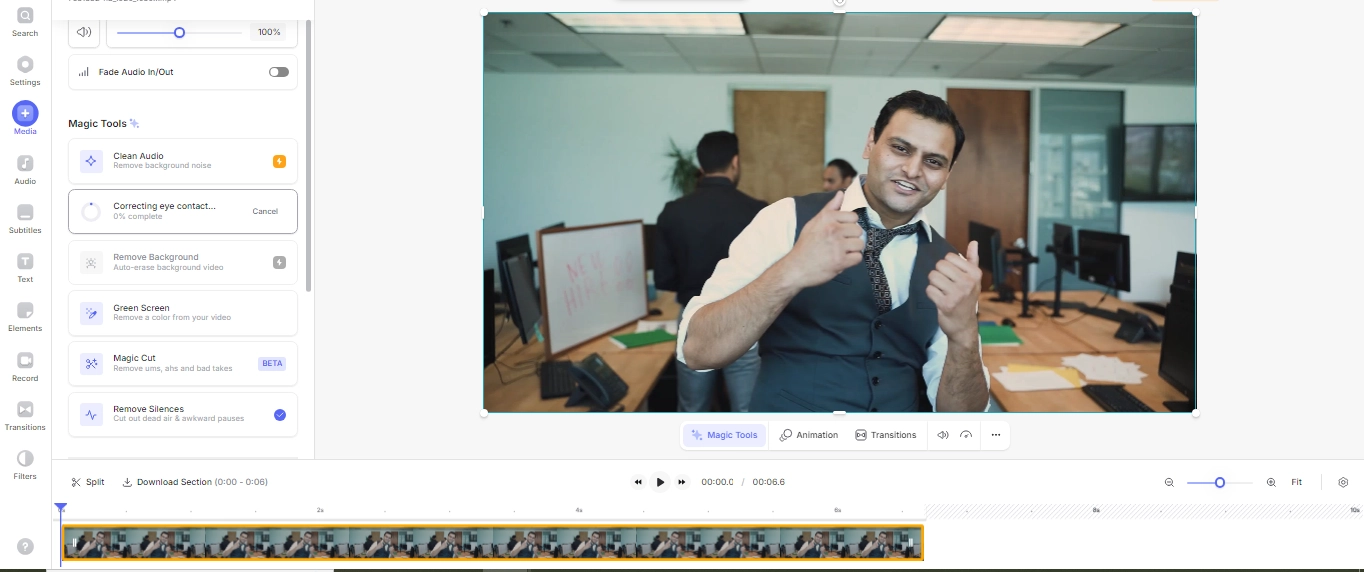
Step 4. You won’t have to take much care about the different features, AI is advanced enough to detect the person’s eye direction and correct it. But in order to manually adjust the eye contact, click on the search option and write eye contact. The feature will appear. Select it.
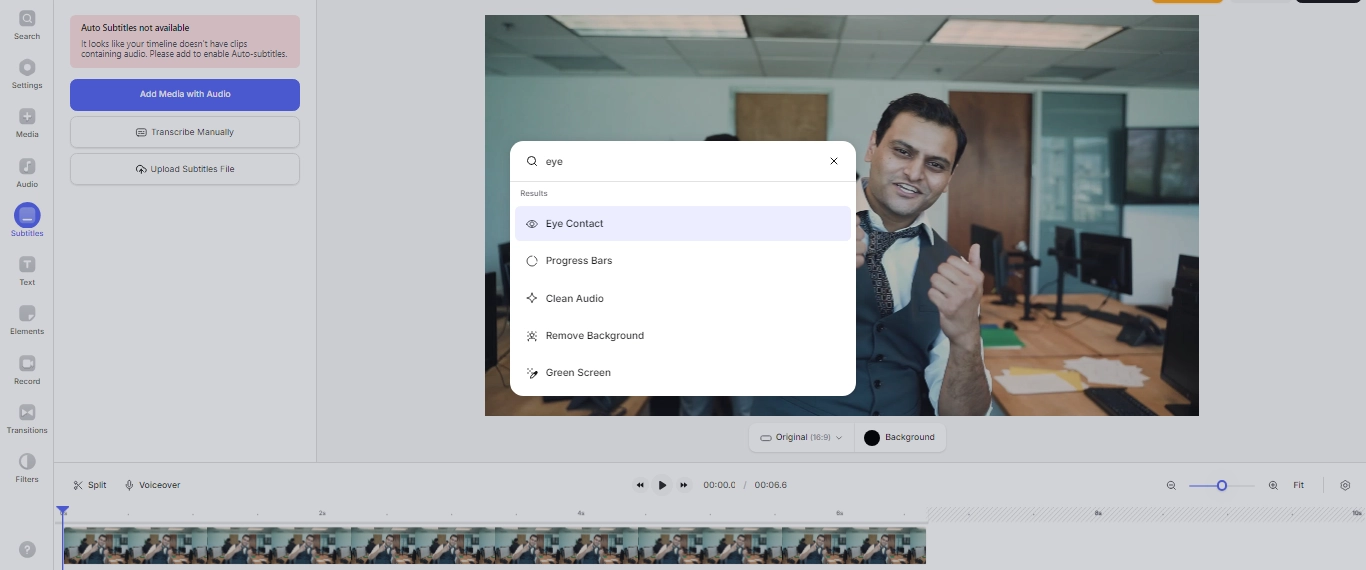
Step 5. Click on the eye contact option and the process will start. You can easily download it and even share it via the tool.
4. Swap Your Lazy Eyes to Opening Sights on Overflow AI

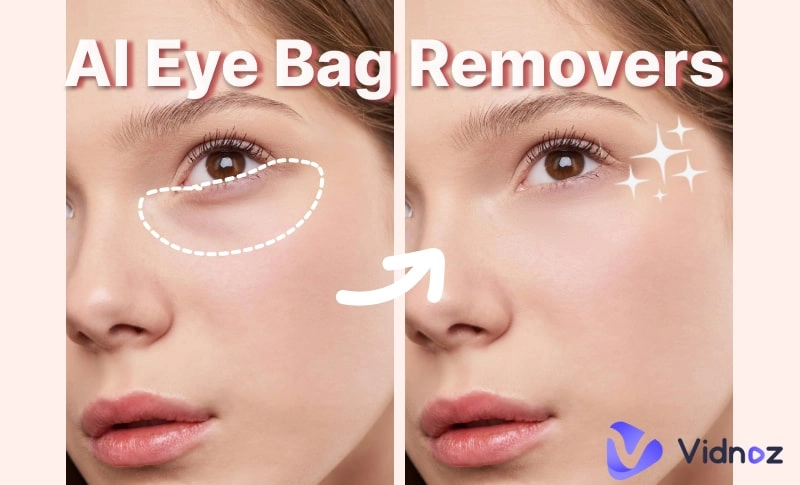
It happens a lot of times when you’re taking a group photo, and someone blinks at the wrong moment. Not only that but most of the time even if you feel fresh and active, your eyes appear sleepy in the picture. Why does that happen? Can’t interpret the actual reason, but can show you an advanced AI tool named Overflow AI which not only smoothly adjusts your eyes, but makes them look active and fresh.
Also read: How To Fix Closed Eyes In A Photo - Solved On PC, Ios, And Android >>
Pricing: Free
Key Feature
- Properly opened eyes make you look fresh and active
- It's friendly for both tech newbie and pro guru.
- Smooth edits and adjusts.
Steps to Swapping Lazy Eyes
Step 1. The process of editing on Overflow AI is as simple as it can be. All you have to do is to visit the site and click on the ‘Upload image’.
Step 2. After uploading your image, you don’t have to click on or choose any feature because the tool will take care of this on its own.
Step 3. You will get the results in a couple of milliseconds. You can save it and share it easily via the tool’s interface.
Bonus: Test If the Swapped Eyes Suit Your Face
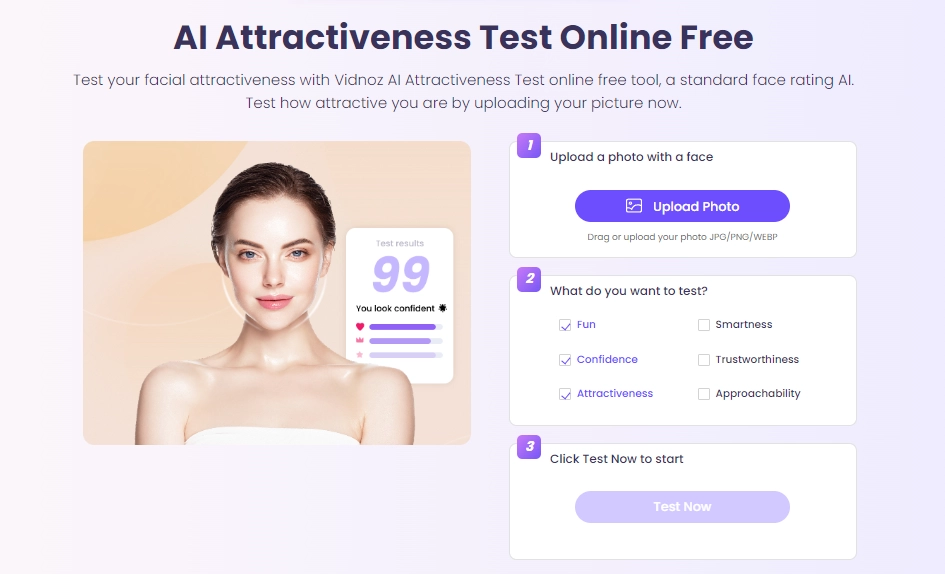
You’ve edited your eyes in the above-mentioned tools or maybe manually via Photoshop, but don’t know if the editing has made your face look more good or bad, you need Vidnoz AI attractiveness test tool.
It is capable of showing you how pretty your face is by giving you an attractiveness score. It will show you if your eyes have properly blended in or not.
Let’s get towards the step-by-step procedure to check if the eye wins the attractiveness:
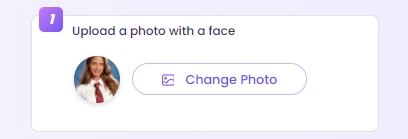
Step 1. Navigate to Vidnoz AI Attractiveness Tool
Step 2. Upload Your Eye-Swapped Image
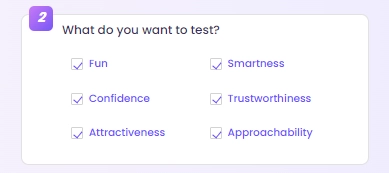
Step 3. Ensure Eye-Swapped Image Dimensions
Select what you want to test; if it is attractiveness, smartness, and whatnot. Mark all the options that you want to test about your face.
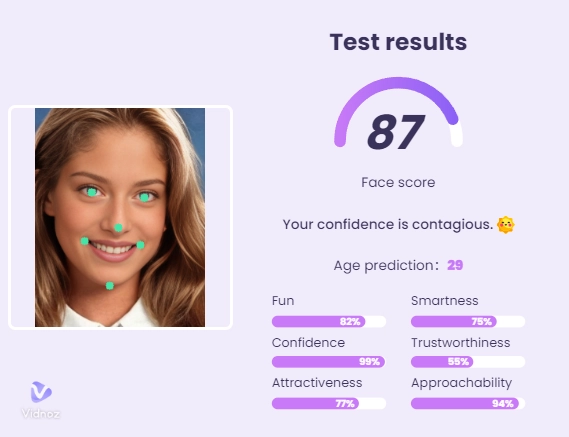
Step 4. Tab the Button and Wait for Your Test Result
Click ‘Test Now’ and you’re all set. Test results will appear instantly, then you’ll be given a Download and share option to show it to your friends and loved ones.
Conclusion
Eye swap is a process that requires professional editing and graphic skills. But it happens only when you are trying to swap eyes manually in Photoshop or any other graphic designing tools. With AI tools, you won’t have to care about anything. With a few clicks, your edited swapped eyes picture will be provided smoothly. That’s how easy things have become due to the emergence of AI.
Start swapping and testing how the new eyes fit you with Vidnoz!